As I blogged about in the previous two articles, I recently updated my NeoVim configuration for the fourth time. Although it might sound like a lot of config updates, keep in mind that it happened over a period of four years.
- The first version was a port of my existing Vim configuration. Because NeoVim is backward compatible with Vim, you can just move the configuration over and it will work
- In the second version, I migrated my plugin manager to Packer. This config was a mix of old style Vim config and the newer NeoVim style with some plugins migrated to Lua equivalents
- Then I decided to go 100% Lua config and started using Kickstart.nvim and LazyVim.
- This fourth time around I used Kickstart and LazyVim as guides to write my own from scratch.
You can find my NeoVim configuration on Github
In this article I am going to go through and explain my configuration step-by-step. I have a terrible memory, so this post will also serve as a guide when I inevitably need to look through this file in the future.
Setup
-- vim: ts=2 sts=2 sw=2 et

-- External tools required
-- Windows Terminal + pwsh
-- mingw64 toolchain: https://www.msys2.org/
-- ripgrep: https://github.com/BurntSushi/ripgrep
-- win32yank for clipboard integration
-- sharkdp/fd
The first comment is for setting up the tabstop, shiftwidth and expandtab settings for this file.
After that I have some comments to remind me what all the external tools that I need to install.
- I use Windows as my primary OS. Windows Terminal for the terminal and pwsh for the shell
- Some of the NeoVim plugins require C compilation. I use mingw toolchain distributed by msys2
- Next are ripgrep and fd
- Finally, win32yank integrates NeoVim with the windows clipboard
This code block loads the lazy.nvim plugin manager.
local lazypath = vim.fn.stdpath("data") .. "/lazy/lazy.nvim"
if not vim.loop.fs_stat(lazypath) then
  -- bootstrap lazy.nvim
  vim.fn.system({ "git", "clone", "--filter=blob:none", "https://github.com/folke/lazy.nvim.git", "--branch=stable", lazypath })
end
vim.opt.rtp:prepend(vim.env.LAZY or lazypath)
Options
The next section sets a bunch of Vim options.
I have space set as my leader key. I used to use forward slash as the leader key for a long time. When I tried out Kickstart it set leader to space by default and I found that very convenient. I also disable space to have no effect in normal and visual mode (in case I press space and dont follow it up with a key sequence)
-- set leader key to space
vim.g.mapleader = ' '
vim.g.maplocalleader = ' '
vim.keymap.set({ 'n', 'v' }, '<Space>', '<Nop>')
Then come a set of options specific to configuring NVim terminal for pwsh
-- terminal settings
local powershell_options = {
  shell = vim.fn.executable "pwsh" == 1 and "pwsh" or "powershell",
  shellcmdflag = "-NoLogo -NoProfile -ExecutionPolicy RemoteSigned -Command [Console]::InputEncoding=[Console]::OutputEncoding=[System.Text.Encoding]::UTF8;",
  shellredir = "-RedirectStandardOutput %s -NoNewWindow -Wait",
  shellpipe = "2>&1 | Out-File -Encoding UTF8 %s; exit $LastExitCode",
  shellquote = "",
  shellxquote = "",
}

for option, value in pairs(powershell_options) do
  vim.opt[option] = value
end
Normally, you have to come out of escape mode in the terminal by pressing <Ctrl-\\><Ctrl-n>, which is quite inconvenient. So I remap that to Esc. Similarly I remap Ctrl-w to directly switch out of the terminal split.
I also have a mapping to minimise the terminal split. I use this when I am running pytest in watch mode. It allows me to see the test success / failure state at the bottom of the screen. (For an example of this workflow, check out this video)
Plugins
Next comes all the plugin configuration. lazy.nvim allows us to create separate plugin files, which is something I'll probably do later on. For now, everything is configured in this one file.
require("lazy").setup({
  -- all plugins go here
})
Theme
For years I used solarized dark mode for both Vim and NeoVim. Right now I'm using catppuccin. I really want to give rose-pine a try too. I also load devicons here as its used by many plugins.
{ "catppuccin/nvim", lazy = true, name = "catppuccin", priority=1000 },
{ "nvim-tree/nvim-web-devicons", lazy = true },
Here is a look at the catppuccin theme
Snippets
Next are Snippets. I use LuaSnip
{ "L3MON4D3/LuaSnip", event = "VeryLazy",
  config = function()
    require("luasnip.loaders.from_lua").load({paths = "./snippets"})
  end
},
LuaSnip supports a few different formats: SnipMate, VSCode or pure Lua. I've gone with pure Lua snippets which I put in the ./snippets folder.
I mainly use snippets for writing this blog which is in RST format. Here is an example

And here is the Lua snippet that I configured for that (s means add snippet, t stands for text node, i is an insert node where the user can edit the template)
local link = s({
  trig = "link",
  name = "Link",
  dscr = "Web link"
}, {
  t({"`"}),
  i(1, "Title"),
  t(" <"),
  i(2, "link"),
  t(">`_"),
  i(0)
})
Language Server Protocol
Now comes the big one: Language Server Protocol (LSP). As I wrote in the previous post, the LSP server will analyse our code. NeoVim will communicate with the LSP server to get autocomplete suggestions and code diagnostics. I am using pyright for the LSP server. This open source LSP server is developed by Microsoft. A closed source derivative is used in VS Code.
{ "neovim/nvim-lspconfig",
  dependencies = {
    "williamboman/mason.nvim",
    "williamboman/mason-lspconfig.nvim"
  },
  config = function()
    local capabilities = vim.lsp.protocol.make_client_capabilities()
    capabilities = require('cmp_nvim_lsp').default_capabilities(capabilities)

    require('mason').setup()
    local mason_lspconfig = require 'mason-lspconfig'
    mason_lspconfig.setup {
        ensure_installed = { "pyright" }
    }
    require("lspconfig").pyright.setup {
        capabilities = capabilities,
    }
  end
},
This part is a little complicated.
First, we are installing Mason. Mason allows us to install / uninstall / manage all our LSP servers from within NeoVim. So we don't need to install pyright separately on the terminal. Next we install nvim-lspconfig and its Mason interface mason-lspconfig.
After that we load cmp_nvim_lsp. This is our autocomplete plugin (more about it in the next section). We ask it what capabilities it requires from the LSP server. Then we tell Mason to make sure pyright is installed, and it gets started with the required list of capabilities.
Once set up, you will get LSP diagnostics in NeoVim

Autocomplete
Well, if you thought the LSP configuration was complicated, wait till we get to autocompletion. I am using hrsh7th/ncim-cmp as the autocomplete plugin. This plugin can autocomplete from many different sources. I have it configured to autocomplete from LSP (via cmp-nvim-lsp) as well as LuaSnip snippets (via cmp_luasnip).
{ "hrsh7th/nvim-cmp",
  dependencies = {
    "hrsh7th/cmp-nvim-lsp",
    "L3MON4D3/LuaSnip",
    "saadparwaiz1/cmp_luasnip"
  },
  config = function()
    local has_words_before = function()
      unpack = unpack or table.unpack
      local line, col = unpack(vim.api.nvim_win_get_cursor(0))
      return col ~= 0 and vim.api.nvim_buf_get_lines(0, line - 1, line, true)[1]:sub(col, col):match("%s") == nil
    end

    local cmp = require('cmp')
    local luasnip = require('luasnip')

    cmp.setup({
      snippet = {
        expand = function(args)
          luasnip.lsp_expand(args.body)
        end
      },
      completion = {
        autocomplete = false
      },
      mapping = cmp.mapping.preset.insert ({
        ["<Tab>"] = cmp.mapping(function(fallback)
          if cmp.visible() then
            cmp.select_next_item()
          elseif luasnip.expand_or_jumpable() then
            luasnip.expand_or_jump()
          elseif has_words_before() then
            cmp.complete()
          else
            fallback()
          end
        end, { "i", "s" }),
        ["<s-Tab>"] = cmp.mapping(function(fallback)
          if cmp.visible() then
            cmp.select_prev_item()
          elseif luasnip.jumpable(-1) then
            luasnip.jump(-1)
          else
            fallback()
          end
        end, { "i", "s" }),
        ["<c-e>"] = cmp.mapping.abort(),
        ["<CR>"] = cmp.mapping.confirm({ select=true }),
      }),
      sources = {
        { name = "nvim_lsp" },
        { name = "luasnip" },
      }
    })
  end
},
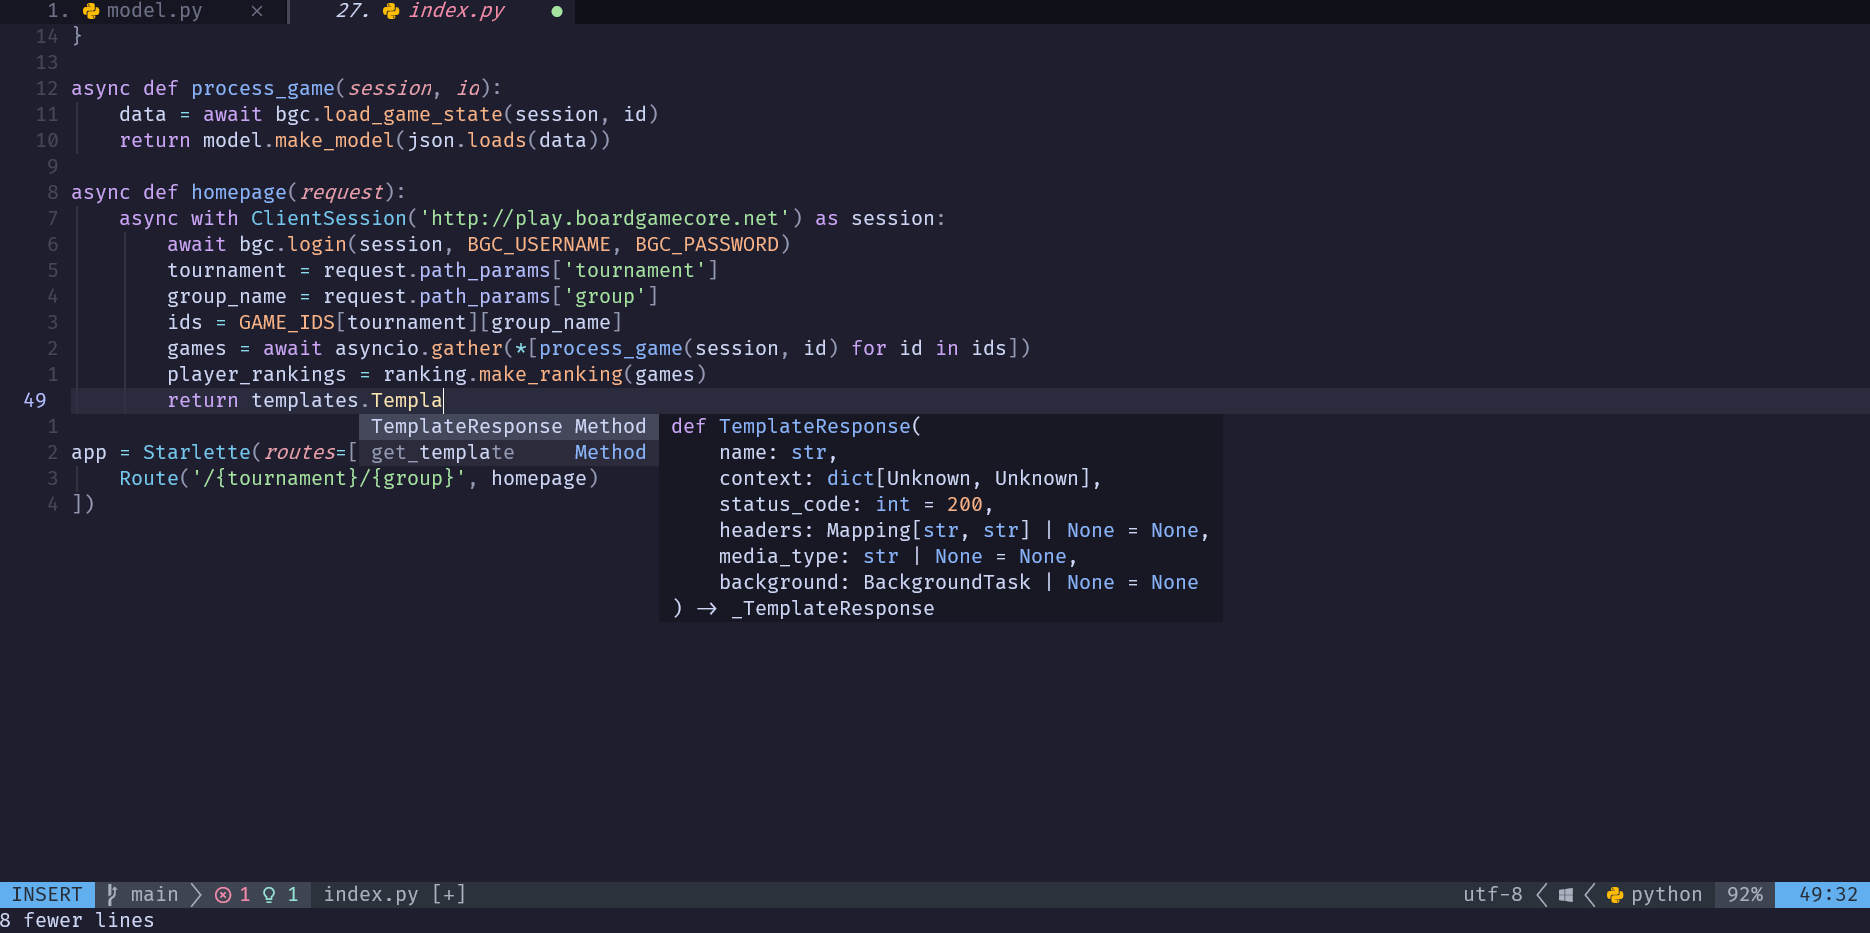
Most of this configuration is setting up the keys for autocomplete. I use TAB to trigger autocompletion. Since TAB is also a normal key used for indentation and moving between sections of a LuaSnip snippet, we need to write some code so it triggers correctly. Essentially, if you press TAB immediately after any text, the plugin will pop up the autocomplete menu. If the menu is already open, then it will cycle through the items in the autocomplete menu. Otherwise it will fall back to the default behaviour. Same for Shift-TAB in reverse order.
This is what it looks like in action
Treesitter
We configure Treesitter next. Treesitter is a fast, incremental code parser. It can parse the code as we type and give the results to NeoVim. NeoVim mainly uses it for syntax highlighting, though there are a few other use cases as well. The syntax highlighting is superior to the usual regex based highlighting. Treesitter can differentiate between a local and global variable for example, even though both have the same regex.
I have treesitter configured for a bunch of languages.
{ "nvim-treesitter/nvim-treesitter", version = false,
  build = function()
    require("nvim-treesitter.install").update({ with_sync = true })
  end,
  config = function()
    require("nvim-treesitter.configs").setup({
      ensure_installed = { "c", "lua", "vim", "vimdoc", "query", "python", "javascript" },
      auto_install = false,
      highlight = { enable = true, additional_vim_regex_highlighting = false },
      incremental_selection = {
        enable = true,
        keymaps = {
          init_selection = "<C-n>",
          node_incremental = "<C-n>",
          scope_incremental = "<C-s>",
          node_decremental = "<C-m>",
        }
      }
    })
  end
},
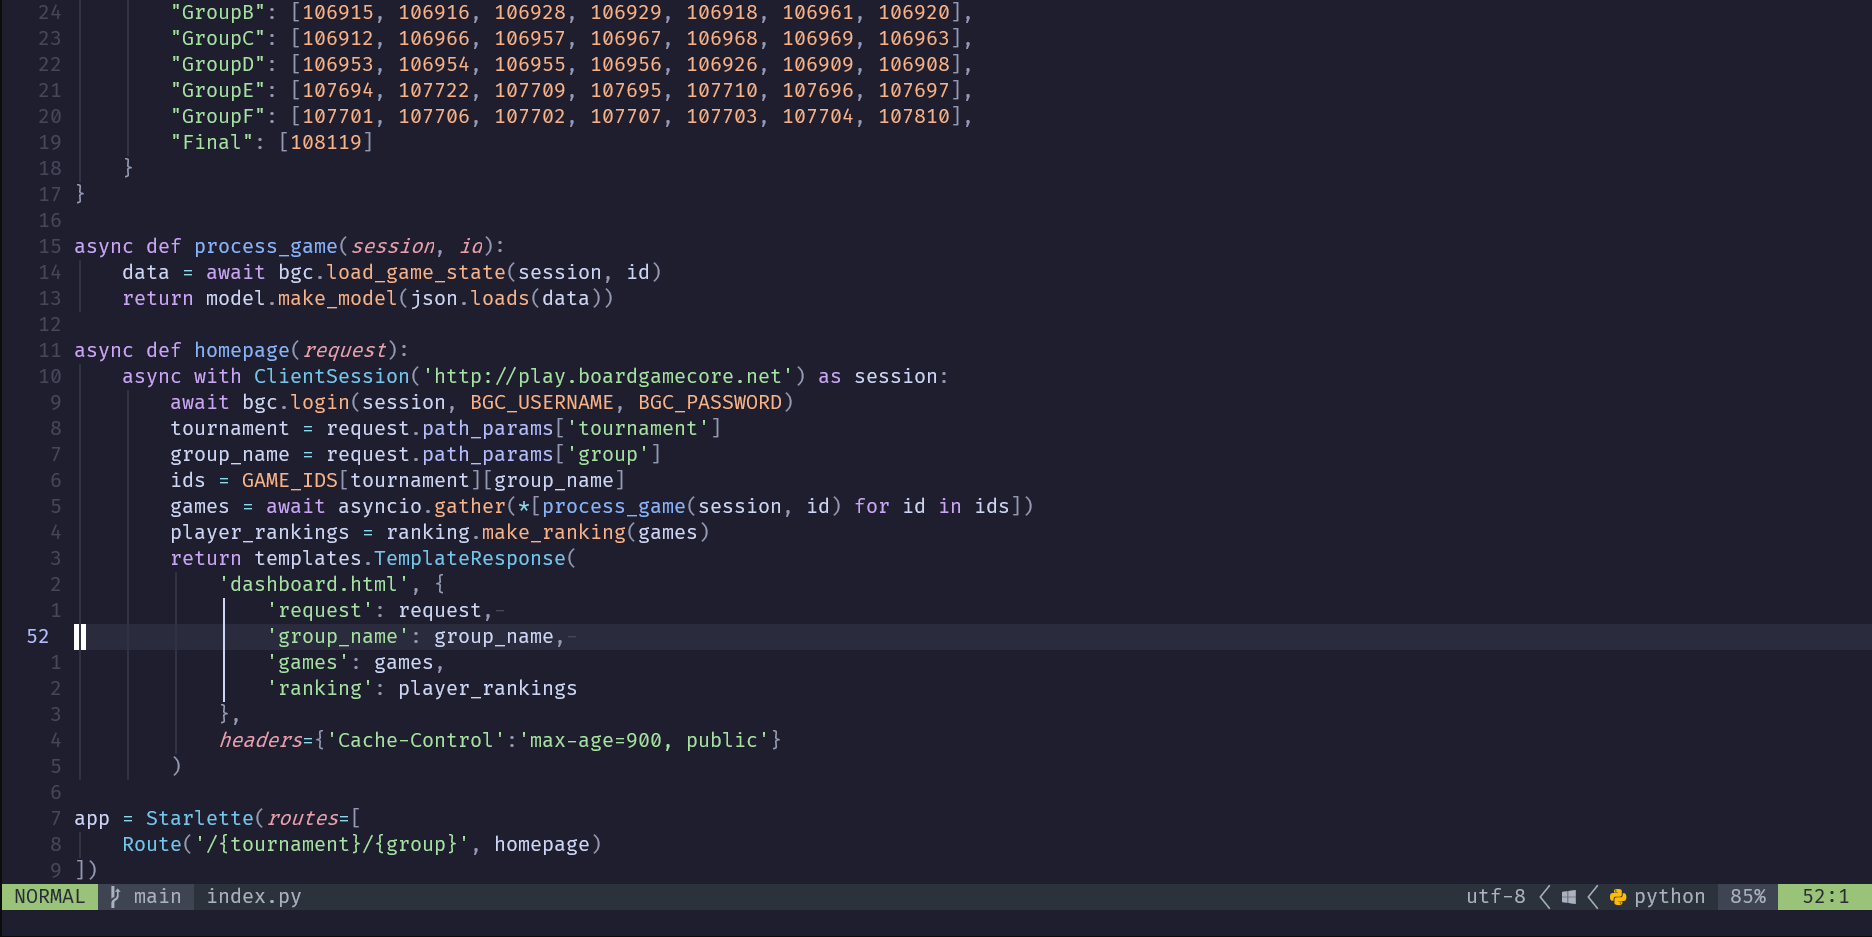
In addition, I have enabled incremental selection on Treesitter. Pressing Ctrl-n will select the innermost syntactical piece of code based on the cursor location. Press Ctrl-n again and it expands the selection to the next scope in the parse tree. Take a look

Here the cursor starts on the return word. Had the cursor beein inside the list comprehension, then it would have selected the list comprehension first, then the whole line and so on. This is such a great feature.
Telescope
The last of the big configurations is Telescope. Telescope is a fuzzy finder that can search for different things. You can search for files in the current project, switch between open buffers, search text within all the files, symbols in the document -- almost anything really. Check the docs for a full list of capabilities.
The two most common that I use are <leader>sf to fuzzy search and open file in project, and <leader><space> to swap between buffers.
{ "nvim-telescope/telescope.nvim", cmd = "Telescope", version = false,
  dependencies = { "nvim-lua/plenary.nvim" },
  keys = {
    { "<leader>sf", "<cmd>Telescope git_files<cr>", desc = "Find Files (root dir)" },
    { "<leader><space>", "<cmd>Telescope buffers<cr>", desc = "Find Buffers" },
    { "<leader>sg", "<cmd>Telescope live_grep<cr>", desc = "Search Project" },
    { "<leader>ss", "<cmd>Telescope lsp_document_symbols<cr>", desc = "Search Document Symbols" },
    { "<leader>sw", "<cmd>Telescope lsp_dynamic_workspace_symbols<cr>", desc = "Search Workspace Symbols" },
  },
  opts = {
    extensions = {
      fzf = {
        fuzzy = true,
        override_generic_sorter = true,
        override_file_sorter = true,
        case_mode = "smart_case"
      }
    }
  }
},
{ "nvim-telescope/telescope-fzf-native.nvim",
  build = "make",
  config = function()
    require('telescope').load_extension('fzf')
  end
},
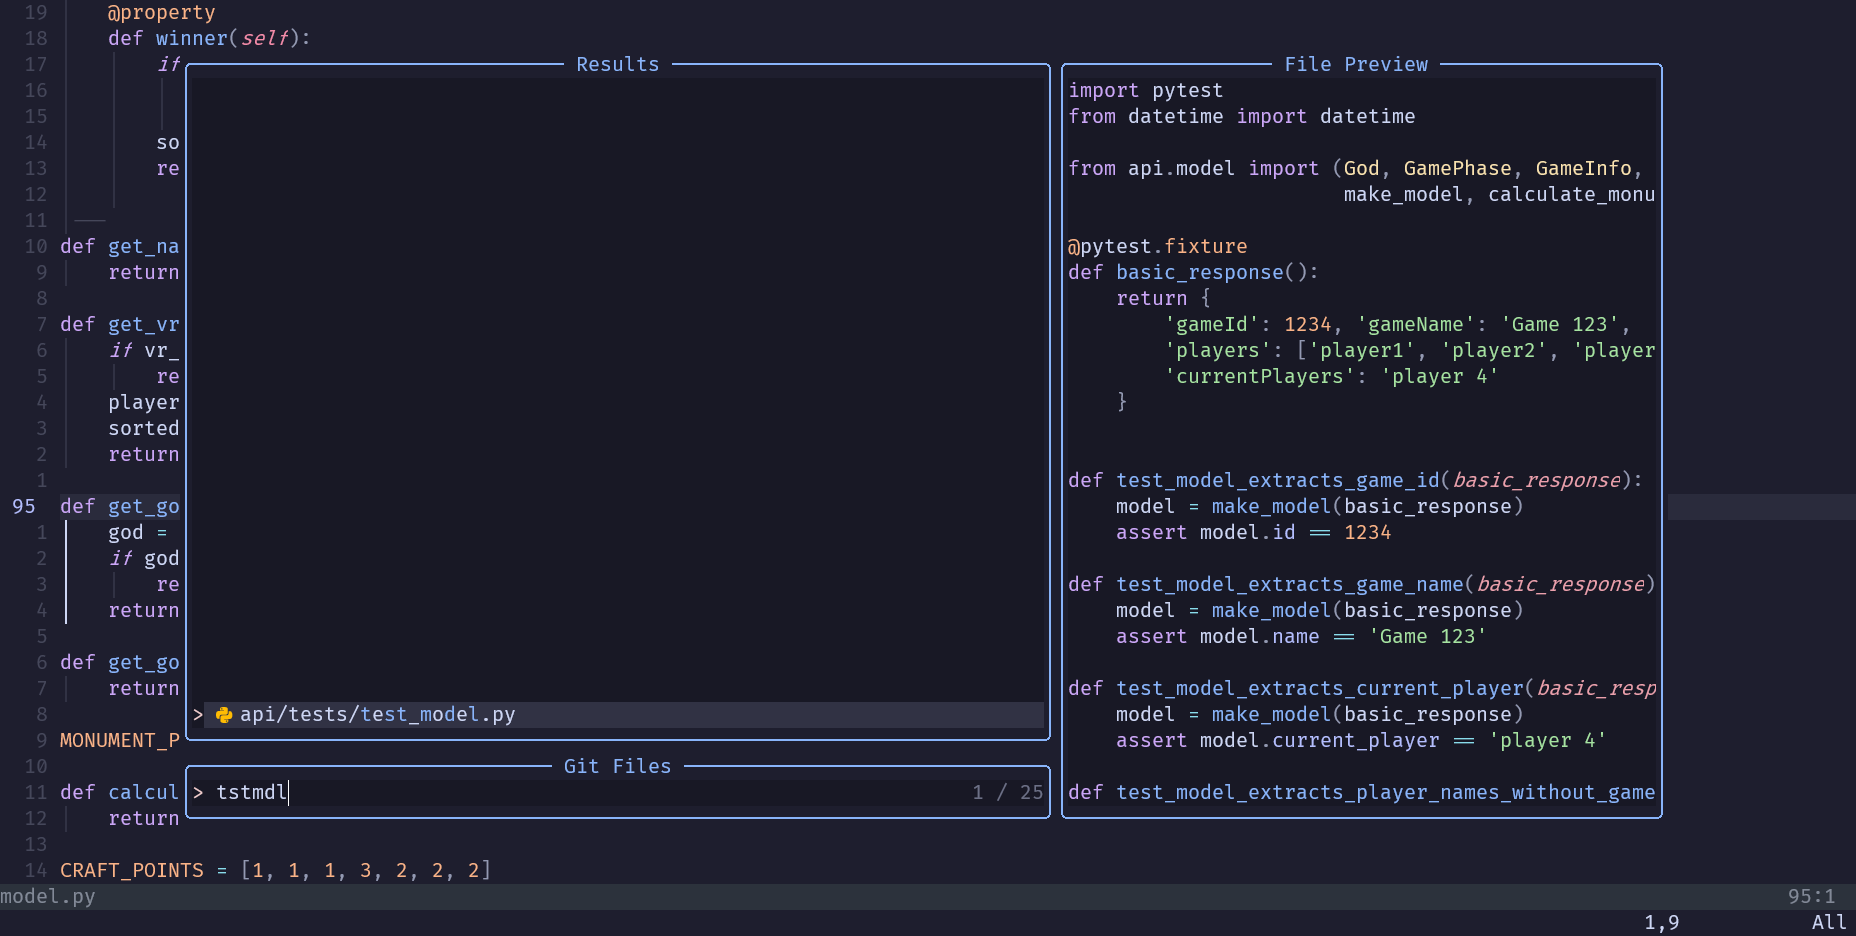
Here is a screenshot using Telescope to fuzzy find a file in the project
Linting & Formatting
I use the null-ls to lint and reformat the file everytime I save it. I use ruff as the linter and Black for formatting Python code.
null-ls supports both, as well as many others.
{ "jose-elias-alvarez/null-ls.nvim",
  dependencies = { "nvim-lua/plenary.nvim" },
  config = function()
    local null_ls = require("null-ls")

    null_ls.setup({
      sources = {
        null_ls.builtins.diagnostics.ruff,
        null_ls.builtins.formatting.black,
      }
    })
  end
},
Terminal
Nothing much to say about this really. toggleterm.nvim will open the terminal when I press Ctrl-s. Most of the interesting terminal configuration happened earlier in the config. toggleterm is nice because it allows you to have multiple terminals open. Show / hide them all or show / hide a single one. Useful when you want to run a server on one terminal, hide it and open another terminal for running commands.
An interesting feature is you can select some code and send it to run on a terminal. So if you have a Python REPL session open in a terminal, you can select code in the buffer and have it run in the REPL.
{ "akinsho/toggleterm.nvim", event = "VeryLazy", version = "*",
  opts = {
    size = 10,
    open_mapping = "<c-s>",
  }
},
Other Editor Plugins
The rest of the file is standard editor configuration plugins. My configuration is
- lualine for the status line
- bufferline to display a list of open buffers
- mini.pairs for auto-closing quotes, brackets, etc
- mini.surround to surround text with a character, or remove/replace a surrounding
- indent-blankline to show indentation guides (super useful for Python coding)
One nice thing about bufferline is that it allows us to pin buffers, and close all unpinned buffers. Often I find myself working on one or two files, but I temporarily need to open many other files. You can pin the buffers you are working on and just close everything else when you are done.
You can also hook it up to LSP diagnostics, so it will show an icon if the file has any warnings or errors.
Other Stuff
I added an autocommand to highlight text when it is yanked, so you know what was yanked. This is just copied over from Kickstart.
local highlight_group = vim.api.nvim_create_augroup('YankHighlight', { clear = true })
  vim.api.nvim_create_autocmd('TextYankPost', {
    callback = function()
      vim.highlight.on_yank()
    end,
  group = highlight_group,
  pattern = '*',
})
Kickstart also has a convenience remapping for using navigation keys with lines that are wrapped (I use arrow keys for nagivation in NeoVim)
vim.keymap.set('n', '<Up>', "v:count == 0 ? 'gk' : 'k'", { expr = true, silent = true })
vim.keymap.set('n', '<Down>', "v:count == 0 ? 'gj' : 'j'", { expr = true, silent = true })
Last, there are some useful LSP related keymaps. These should be self explanatory. Note that pyright does not support code actions. But I put a keymap for it anyway 😆
vim.keymap.set('n', '<leader>rn', vim.lsp.buf.rename, {desc = 'Rename Symbol'})
vim.keymap.set('n', '<leader>gd', vim.lsp.buf.definition, {desc = 'Goto Definition'})
vim.keymap.set('n', '<leader>ca', vim.lsp.buf.code_action, {desc = 'Code Action'})
vim.keymap.set('n', 'K', vim.lsp.buf.hover, {desc = 'Hover Documentation'})
vim.keymap.set('n', '<leader>ff', vim.lsp.buf.format, {desc = 'Format Code'})
Summary
Well, thats a walkthrough of the entire config.
It covers all the basics and should be a good starting point for anyone wanting to setup their NeoVim from scratch for Python coding. /tree By the end of it all, you should have a fast, lightweight editor that can do everything that the heavier IDEs do.
So whats next from here? Well you might want to add more plugins or swap some of my plugins with other alternatives. Here are some things that I don't have yet
- Plugin to comment / uncomment code. I just don't do it all that often
- Support for Python virtual environments. I just activate the virtual environment on the terminal before opening nvim and that works fine for me
- Debugging support. I don't do much debugging so I left it out. But if you need it, Mason has support for adding debuggers via Debug Adapter Protocol (DAP)
- File Explorer: I don't include a file explorer plugin as I tend to use Telescope's fuzzy find. If you want one, nvim-tree is quite popular
Apart from that, there are many other plugins so you can customise NeoVim to your preferred way of working. Check out This Week in NeoVim to see whats the latest and greatest.
Happy Editing 📖
Recent Articles
- • Running AI Models Locally on Consumer Hardware Jun 15, 2026
- • AI Coding for Free Using Local LLMs at Chennaipy Meetup Jun 08, 2026
- • Pi and Py: Demoing an Open-Source Agentic Coding Assistant Jun 05, 2026
- • Is Clean Code Still Relevant in the AI Age? May 04, 2026
- • AI Agents Need Hard Boundaries Apr 24, 2026